 Treasuries are a great way to show your creativity by putting together collections of items. These collections can feature shops that you especially like, items that follow a particular theme or color, shops from a specific team...pretty much any reason you can think of is a reason to make a Treasury. But exactly HOW do you make one? Let's go through it step by step:
- Come up with a theme for your treasury: For this example we'll use "Summer with the LabRats", using just fellow LabRats shops in our treasury.
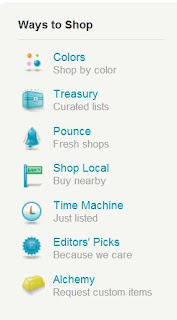
- Go to Etsy. On the front page, scroll down on the left-hand side until you see “Treasury"
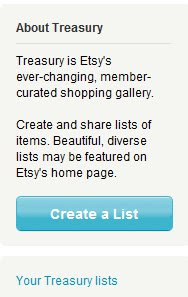
- Click on “Treasury.” This will bring you to Treasury East, where new Treasuries are being accepted. On the right hand side of the page, you will see a box with a button in it saying “Create a List”. Go ahead and click on this button.

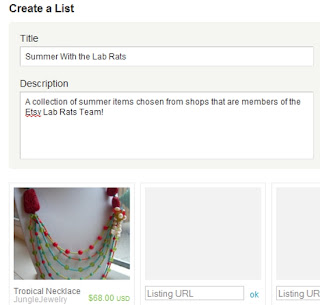
- Clicking on "Create a List" will take you to the main “creation” page. Here you can name your Treasury, write up a description for it, place the items that you want to include, decide if you want it to be private or public, and you can “tag” your Treasury just as you would an item listing to help it get found!

- After entering a title and description for our Treasury, it's time for the fun part - selecting items!
- Note: It's often easier to have two or three tabs (or separate windows) open at a time when working on a Treasury: one for your actual treasury page, and the others to look for items.
- First thing to do is click on the image of the item (in this case a necklace) that you want to include. This will bring you to the listing page.
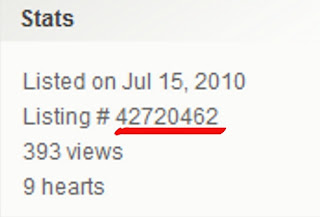
- Since you need the listing # to add an item to the treasury, scroll down the page until you find this "Stats" box on the right-hand side. The number underlined in red is the number you need, so highlight it, right-click, and select "Copy"

- Then go back to the Treasury page and select the first open spot that says "Listing URL". Then right-click in the box, select "Paste" and the number that you copied will be pasted right in the box.

- After hitting "ok" the picture for the item that you wanted will appear in the box, along with the item name, shop name, and price of the item.

- The picture above also shows where I typed in the title of the Treasury "Summer With the Lab Rats" and the description. For this example, I then went ahead and repeated the same selection process for the rest of the 16 spots. It's always a good idea to fill all 16 slots. Only Treasuries that are full have a chance of being selected for the Front Page.

- So now all 16 slots are filled, each with a different item from a different shop. The last step is to "tag" the Treasury. Tagging a Treasury is similar to tagging an item; you want to use words that will help your Treasury be found by others. For this example, I chose to tag the treasury with the tags "labratsteam, summer, fun, bright, colors".
- Type your tags in the "Tags" box, separated by a comma, and then click "Add". This will add them to your Treasury.
Here is a link to the completed Treasury, "Summer With the Lab Rats"
Now that the mystery of how to create Treasuries is gone, go on out there and start creating. Keep your eye out for an upcoming team treasury challenge to put your treasury making skills to the test!


Thanks Laurie! I Might just give making a treasury another shot! Nice job!!
ReplyDeletethat was very well done
ReplyDeleteI love making treasuries
Hi!
ReplyDeleteI am so enjoying this.
You guys are awesome!
Good work.
This comment has been removed by the author.
ReplyDeleteThis comment has been removed by a blog administrator.
ReplyDeleteThis comment has been removed by the author.
ReplyDeleteFinally! A fun, easy to understand treasury how-to!
ReplyDeleteThanks! :)
Beth/BabyEtte
Thank so much for the great instructions. Here is my last treasury
ReplyDeletehttp://www.etsy.com/treasury/4c52f3edf3906d91dbc31caf/silver-and-pink-bling?index=0
Oops that was posted under the wrong shop.
ReplyDeleteScrapHappieAz has too many alter egos and it gets confusing in here.
So My treasury is http://www.etsy.com/treasury/4c52f3edf3906d91dbc31caf/silver-and-pink-bling?index=0
The Poster Sketch tool is very handy if you're building a Treasury and need to come back to finish it later. It also allows drag-and-drop rearranging of items, and you can export the item IDs to work on more than one Treasury at a time.
ReplyDeletehttp://www.etsy.com/poster_sketch.php